Welding duty cycle calculator
What the rating really means, weld-time vs cool-time at any amperage, and how to plan long jobs without thermal trips.
The definition
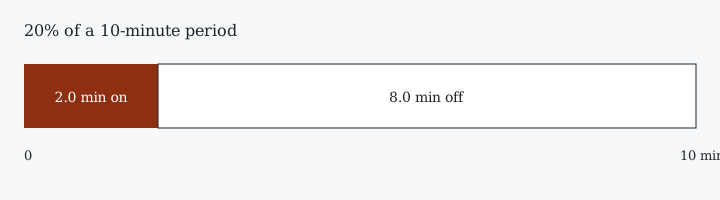
Duty cycle is the share of a 10-minute window a machine can weld at a stated amperage without overheating. 20% at 140 A = 2 minutes of arc, 8 minutes of cooling, repeating. Manufacturers test at rated line voltage and 104°F (40°C) ambient — hot garages and long extension cords eat into real performance.
Runtime at other amperages
Heat generated scales with current squared, so runtime scales inversely with the square:
Allowable time % = rated % × (rated amps ÷ actual amps)², capped at 100%.
| Machine rating | Weld time (min per 10) at actual amps | ||||
|---|---|---|---|---|---|
| 70 A | 90 A | 110 A | 130 A | 140 A | |
| 140 A @ 20% | 8.0 | 4.8 | 3.2 | 2.3 | 2.0 |
| 140 A @ 40% | 10.0 | 9.7 | 6.5 | 4.6 | 4.0 |
| 180 A @ 30% | 10.0 | 10.0 | 8.0 | 5.8 | 5.0 |
| 200 A @ 25% | 10.0 | 10.0 | 8.3 | 5.9 | 5.1 |
| 250 A @ 40% | 10.0 | 10.0 | 10.0 | 10.0 | 10.0 |
Each cell is what the duty tab prints: percent is the rounded result of rated percent × (rated amps ÷ actual amps)², capped at 100, and minutes are that uncapped-then-capped percent × 0.1, shown to one decimal. A 10.0 cell is the 100 percent cap. Check the machine plate for its actual rated amps and duty pair. A rating quoted without amperage is meaningless. Published plates for hobby and farm machines are on the welder duty cycle and amperage chart.
Weld time vs cool time in practice
The 10-minute window sounds restrictive, but arc-on time is naturally low in most work: strike, weld a bead, chip/inspect, reposition. A typical DIY pace is 30–60 seconds of arc per 3–4 minutes — a 10–20% effective duty cycle, right at spec for a hobby-class machine. Continuous runs that actually threaten the limit:
- Long joint welds (a 4-ft seam at 12 ipm is 4 minutes of solid arc — nearly a full 20% budget in one go).
- Aluminum TIG AC work, which runs hot and slow.
- High-amperage stick on thick plate, where rods burn in 2 minutes and you restrike immediately.
Plan around it: mark your machine's arc-on budget at your working amperage, break long seams into passes, and alternate weld/fit-up sections. If a thermal light comes on, wait for the reset — most inverters restore in 5–15 minutes. Forcing a hot machine back on shortens capacitor and IGBT life.
Buying takeaway
Two machines with the same max amps can differ 3–4× at your working amperage. Match the duty-cycle-at-your-amps figure to the job: structural/production work wants ≥40% at your running current; hobby and repair work is fine at 20–25%. Check the settings your material actually needs with the thickness calculator and the MIG wire speed chart, and remember that a machine tripping mid-bead also wrecks your per-foot cost math — restarts and scrap are labor you pay for twice.
What those duty-cycle ratings look like on a household outlet is covered in what size welder a 120V outlet can run. Choosing a stick machine for the 1/4 inch window this site’s stick tab prints, against the farm guide’s 175–250 A stick class, is on how to choose a stick welder.
As an Amazon Associate I earn from qualifying purchases. The Amazon links below are affiliate links; they don't change the math.
Matched welders and PPE for your duty-cycle class: 200 A MIG welders on Amazon · auto-darkening helmets on Amazon · welding gloves on Amazon
Frequently asked questions
What does 20% duty cycle at 140 amps mean?
20% duty cycle at 140 A means 2.0 minutes of welding per 10-minute cycle, then 8.0 minutes of cooling.
What does the duty tab print for a 140 A, 20% machine at 100 A?
39 percent: 3.9 minutes on and 6.1 minutes off. That is 20 × (140 ÷ 100) squared, which is 39.2, rounded to 39.
Sources & Standards
Solid-wire MIG starting points on this site follow the Miller page below: 1 amp per .001 inch of steel, and the wire-speed multipliers.